Tuesday, November 19, 2013
No Clutch!
As stated in an earlier post, I sent the clutch and pressure plate off to South Australia to be reconditioned. Unfortunately they can't recondition it, so it looks like I will need to obtain a new clutch kit from Belgium. All work on the G has ceased at the moment until I can get the clutch issue sorted.
Thursday, October 31, 2013
Slow progress.
Things have slowed a bit as I prepare to rebuild the engine.
The brakes are now fitted up and the G now has a working hand brake for the first time in probably 12-15 years. I only need to put in some brake fluid and bleed the lines to have them up and working. I will wait until the engine is fitted before introducing the fluid.
The Clutch has been sent off to be re conditioned (In South Australia) and I have had the radiator re-conditioned. John Kitchen has suggested we rebuild the engine together rather than having my mechanic do it. John has built several Gordini engines over the years so I believe it would be in good hands there. I used to build my R8/10 engines years ago but I'm a bit rusty now. Not long now and it should be on the road.
Friday, October 11, 2013
Original options now fitted.
As I mentioned in an earlier post, this Gordini was optioned by the original owner John Sever with chrome gutter trims and a glove box lid. The chrome gutter trims survived on the car however the glove box lid was removed some time ago, probably as most other Gordini's didn't have one. My search of many months to obtain a lid came to an end yesterday when Aussie Frogger, Anthony, from South Australia came up with the goods and gave me a lid. The lid was sun damaged and looked its 45 years of age but was otherwise in good condition. I was going to clean it up and paint it to look the same as the original surround however when I hit it with some fine wet and dry it came up like new removing all the grey fade. I had some hinges on an old chrome surround which I cleaned up and painted and now the lid is fitted and looks great. Thanks Anthony.

The glove box lid completes the original options to the Gordini.
Monday, September 30, 2013
A couple of photos from the 1980's
Here are a couple of photos of my car from the 1980's (C/- RCCA). Note the removal of the radio antenna from the right guard and a sticker over the hole. That guard still has that sticker. I removed the RCCA sticker from the rear window as it was badly sun damaged. The bonnet (which is not fitted to the car) still has the black strip on the bonnet put there by original owner John Sever. Note in the second photo the Cosmic MK1 mag wheels. I think these wheels were fitted by Ara Vartoukian and came off the yellow Bathurst car. These are the same wheels I have which will be fitted upon completion.


On display, possibly by 3rd or 4th owner
some time in the late 70's.

Amaroo Hill Climb with 5th owner Ara Vartoukian.
Some time after 1982.
Some time after 1982.
Friday, September 27, 2013
Small finishing touches.
I have had a couple of stickers made to put on some finishing touches to the car. The first is the paint sticker in the boot near the ID tags. I placed it in exactly the same position as the original as per my photographs prior to the restoration, so yes it is slightly off straight as per how it was originally.
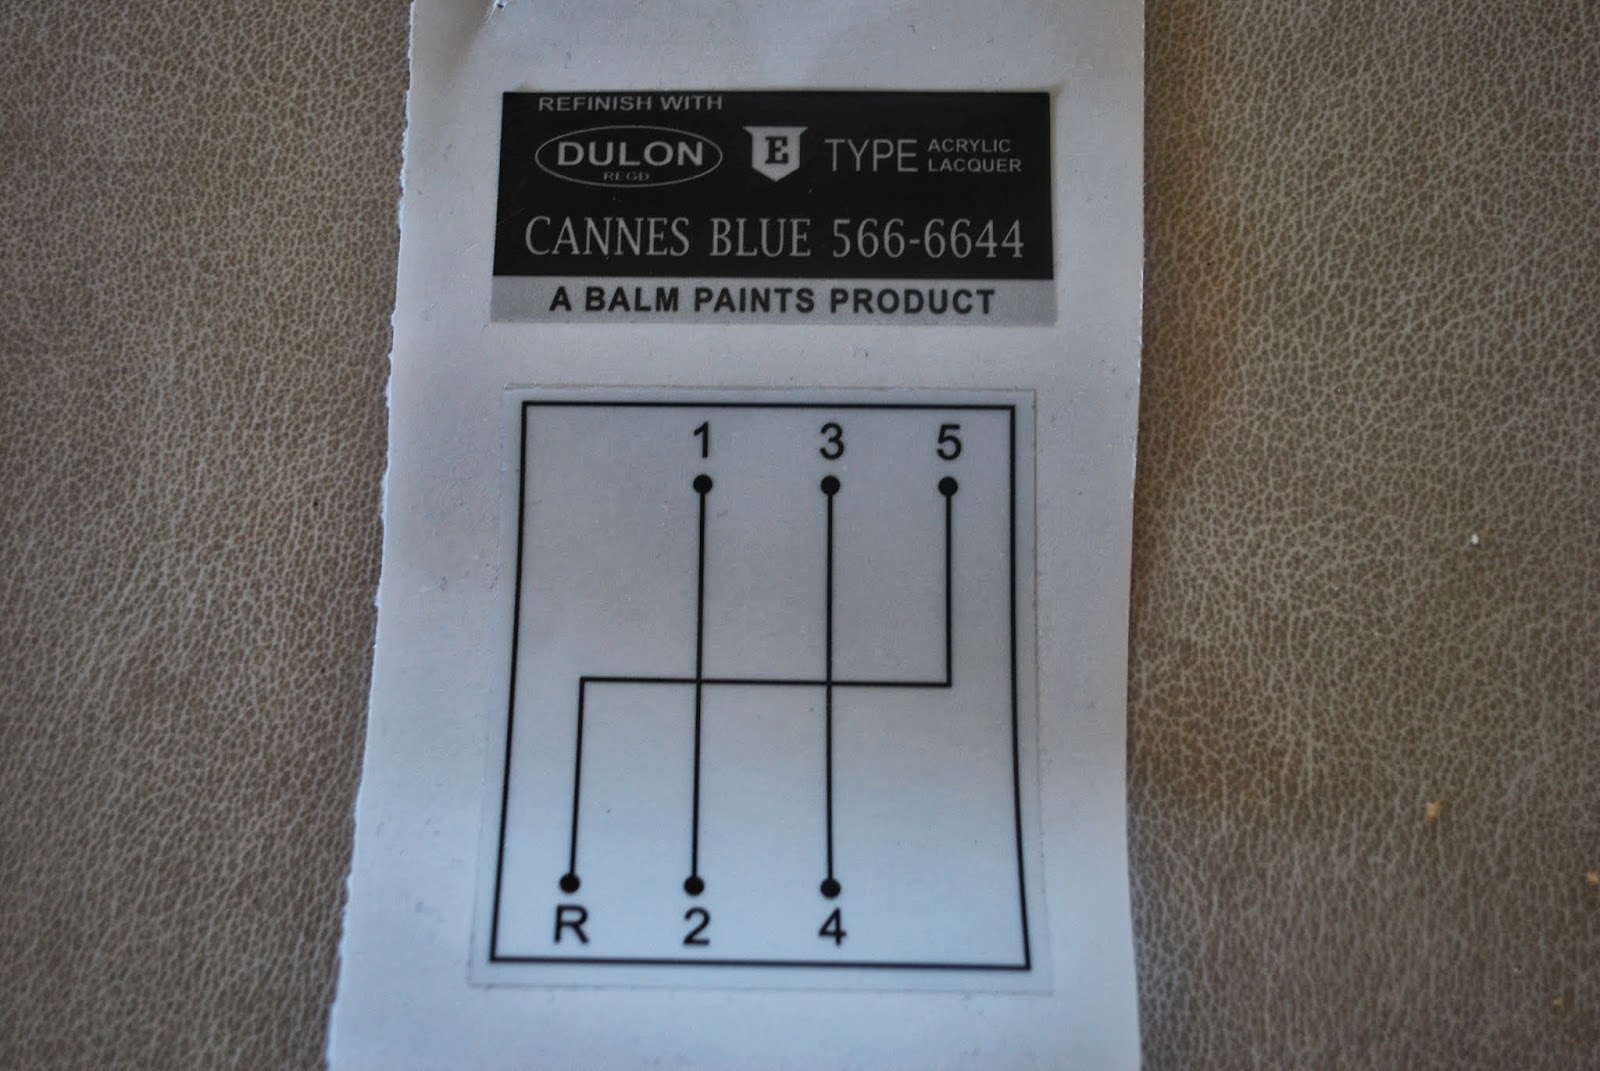
The second is the gear selection on the windscreen. I have never seen one of these stickers on a car as by now all the windscreens have been changed and the stickers long gone. I scaled it the best I could from a photo of the car taken by John Sever in the 1960's.


The second is the gear selection on the windscreen. I have never seen one of these stickers on a car as by now all the windscreens have been changed and the stickers long gone. I scaled it the best I could from a photo of the car taken by John Sever in the 1960's.
New stickers.

Paint code sticker in place as original.
Early photo showing the gear selection sticker on the
windscreen.

New gear selection sticker in place.
Monday, September 16, 2013
Bumpers are back.
I got the bumpers back from Albury the other day unfortunately they forgot to pack 2 of the over riders, 1 front and 1 rear. The offending over riders arrived today in the post. The chrome and repairs made to the bars is great and they really make the car look good. I have fitted both bars now and the front one was no easy task lining up the bolt holes through the chassis rail and the 2 brackets. I'm very happy with the rear bar fitment but the front center section is a bit out.
18/09/2013.
I removed one of the left bolts and using my die grinder I elongated the holes in the bumper bracket a few millimeters and moved the bumper into the correct position. Now the front bumper is dead straight like the rear one.
I'll be sending the engine off soon to be rebuilt. Meanwhile I'll get some tyres fitted to the Cosmic's and finish fitting the brakes so when the engine is fitted it should all be ready for rego, (in a few months).

Prior to being re-chromed.

Re-chromed rear bar fitted.

Front bar ready to be fitted.
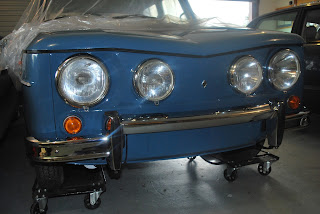


Front bar fitted.

Monday, August 26, 2013
Still waiting, again!
Waiting for the bumpers to come back from the chrome platers.
I have found a gear stick boot from a Ford which is very close to the original item. $20.00 and a real good fit.

I have found a gear stick boot from a Ford which is very close to the original item. $20.00 and a real good fit.

Similar in size but differs in shape. Closest I could find.
Tuesday, July 30, 2013
Steering wheel.
I received my leather steering wheel cover from the UK and I'm very happy with it. After reading the instructions and watching the U tube instructional video (yes, I read the instructions first!) I set to work covering the wheel. It took around 2 hours and at times a bit frustrating as the cotton became tangled now and then on the longer section due to the cotton length. I'm happy with the finished job and it looks quite good as well. A cheap and easy way to repair a worn steering wheel.


Steering wheel prior to fitting the cover. Note the damaged rim.

After I fitted the cover.

All hand stitched, what a job!
Monday, July 29, 2013
All panels fitted.
I have fitted the rear panel now and that is all the panels now fitted to the car. I know it is easier to fit the engine without the rear panel in place however with hands the size of mine I would never get to the panel bolts later. I hope the engine goes in without any problems.
I have stripped the front and rear bumpers down and packed them ready to be re chromed.
The last things to do include-

I have stripped the front and rear bumpers down and packed them ready to be re chromed.
The last things to do include-
- Engine rebuild and fit new clutch and install.
- Reco the radiator.
- Chrome the bumpers.
- Complete the electricials.
- New tires to the Cosmic rims.
Still a lot of work to be done but I can see the light at the end of the tunnel now.

Friday, July 26, 2013
Trim completed.
I picked up the back seat from the trimmer and he has redeemed himself with the seat. The vinyl match and job is excellent. The seat is now the last piece of trim to be fitted except for the lower section of dash which will be fitted when everything else is done and working.
The steering wheel needs a bit of work to the rim. I got a quote to have the rim trimmed in leather which would have cost $500.00! I have ordered a custom made leather cover from the UK for AU$39.00. When it arrives I will fit it myself.
Update 11/05/2016.
I had intended to leave the front seats as original as they were OK. However the drivers seat split along one of the seams and in reality they made the interior look a bit shabby. So I have now had the front seats re-trimmed to match the original design and the re-trimmed rear seat.

The back seat prior to going to the trimmer.

Back from the trimmer.

Back seat fitted. You can see in this shot the original front seat
Which does not match the back seat. This has been rectified by
having the front seats re-trimmed.

Which does not match the back seat. This has been rectified by
having the front seats re-trimmed.

Front seats now re-trimmed to complete the interior.
Thursday, July 11, 2013
Fitting up the panels
I have fitted the engine bay lid and today I fitted the bonnet. All new rubbers and seals on both the bonnet and engine lid makes a tight fit. I need to adjust the LHS bonnet hinge. Note the brand new LH headlight.


Bonnet now fitted. Just needs an adjustment on the left hinge.

Lighting makes a huge difference to the colour.

Wednesday, July 10, 2013
Preparing the panels
I have put the rear panel together with all the lights and trim. I have also put new seals on the underside of the bonnet. The larger seals on the side where it sealed on the guard are good used ones. Locktite contact adhesive is the best I have found for gluing the rubber seals to the car.

New rubber seals in place using original clips and contact adhesive.

Rear panel ready to be fitted to the car.
Monday, July 8, 2013
The last of the panels.
I picked up the last of the panels tonight. Bonnet, Engine bay lid, front right guard and rear panel. I will fit all the bling to the panels and fit them up during the week. Note the New Old Stock RENAULT engine bay lid badge.


The bonnet, ready for new rubbers on the underside and fitting.

Rear panel ready for its bling.

Engine bay lid with its NOS badge.
Friday, June 7, 2013
Model Cars.
While again in wait mode I thought I would post some photos of 2 of my collection of 1/18 scale model cars.
I have many 1/18 cast cars including the Gordini and Alpine and my collection includes many Jaguars, VW Porsche and others. What I note about the Gordini is there are many 1/43 scale models of which I have 2 but the 1/18 scale seems rare as I have not seen many Gordini's in this scale, but they must be out there.


I have many 1/18 cast cars including the Gordini and Alpine and my collection includes many Jaguars, VW Porsche and others. What I note about the Gordini is there are many 1/43 scale models of which I have 2 but the 1/18 scale seems rare as I have not seen many Gordini's in this scale, but they must be out there.

Moyan Blue Rally Car 1/18 with detailed interior and engine bay.
 R8G in Red 1/18. same as above with detail, different wheels.


This is the only Alpine A110 I can afford. 1/18.
 2 x 1/43 scale Gordini's

Monday, June 3, 2013
Repairing the roof after the trimmer.
Nathan from Dent Tech came out today to fix the roof where the trimmer got a bit over zealous with his drill. Lucky I got him out this week as he is off to the US next week to help repair cars after a huge hail storm hit Kansas last week. Apparently there's not enough dent techs to cope with the repairs so some guys from Australia are heading over to help out.


Nathan from Dent Tech doing his thing before heading off
to the US. You can see every blemish under that light!
Monday, May 27, 2013
Right Side.
I have now fitted up all the panels I have back. The right side is almost complete, just needing the front guard. There are 4 panels to come back and be fitted- front right guard, bonnet, rear panel and engine bay lid. Hope to have these items and the rear seat soon. Then its just the engine and some new tires for the cosmic's to go.


Notice the chrome bullet mirror. Same as was fitted by the original
owner back in the 60's. As per some of the original photos sent to me.
Saturday, May 25, 2013
Fitting up the panels.
I have fitted up all the panels on the left hand side today. With the help of my son Michael we managed to get them all lined up well with reasonable gaps. I have fitted the rear right door as well. I think the right side will be the most difficult to get correct. My panel beater is coming over when all the panels are fitted to assist in getting the panels right.
The rubber seals are a real pain as they are glued in place with only 3 locating pins near the lock on each door. I marked out where the rubber fits, roughed up the surfaces, taped up the edge where the rubber fits to stop over gluing the doors and used a good quality contact adhesive. The doors were very hard to close in the first instance but have become much better an hour later. After a few days of being closed the rubber seals will take shape and become easier.


The rubber seals are a real pain as they are glued in place with only 3 locating pins near the lock on each door. I marked out where the rubber fits, roughed up the surfaces, taped up the edge where the rubber fits to stop over gluing the doors and used a good quality contact adhesive. The doors were very hard to close in the first instance but have become much better an hour later. After a few days of being closed the rubber seals will take shape and become easier.

Left side fitted up.
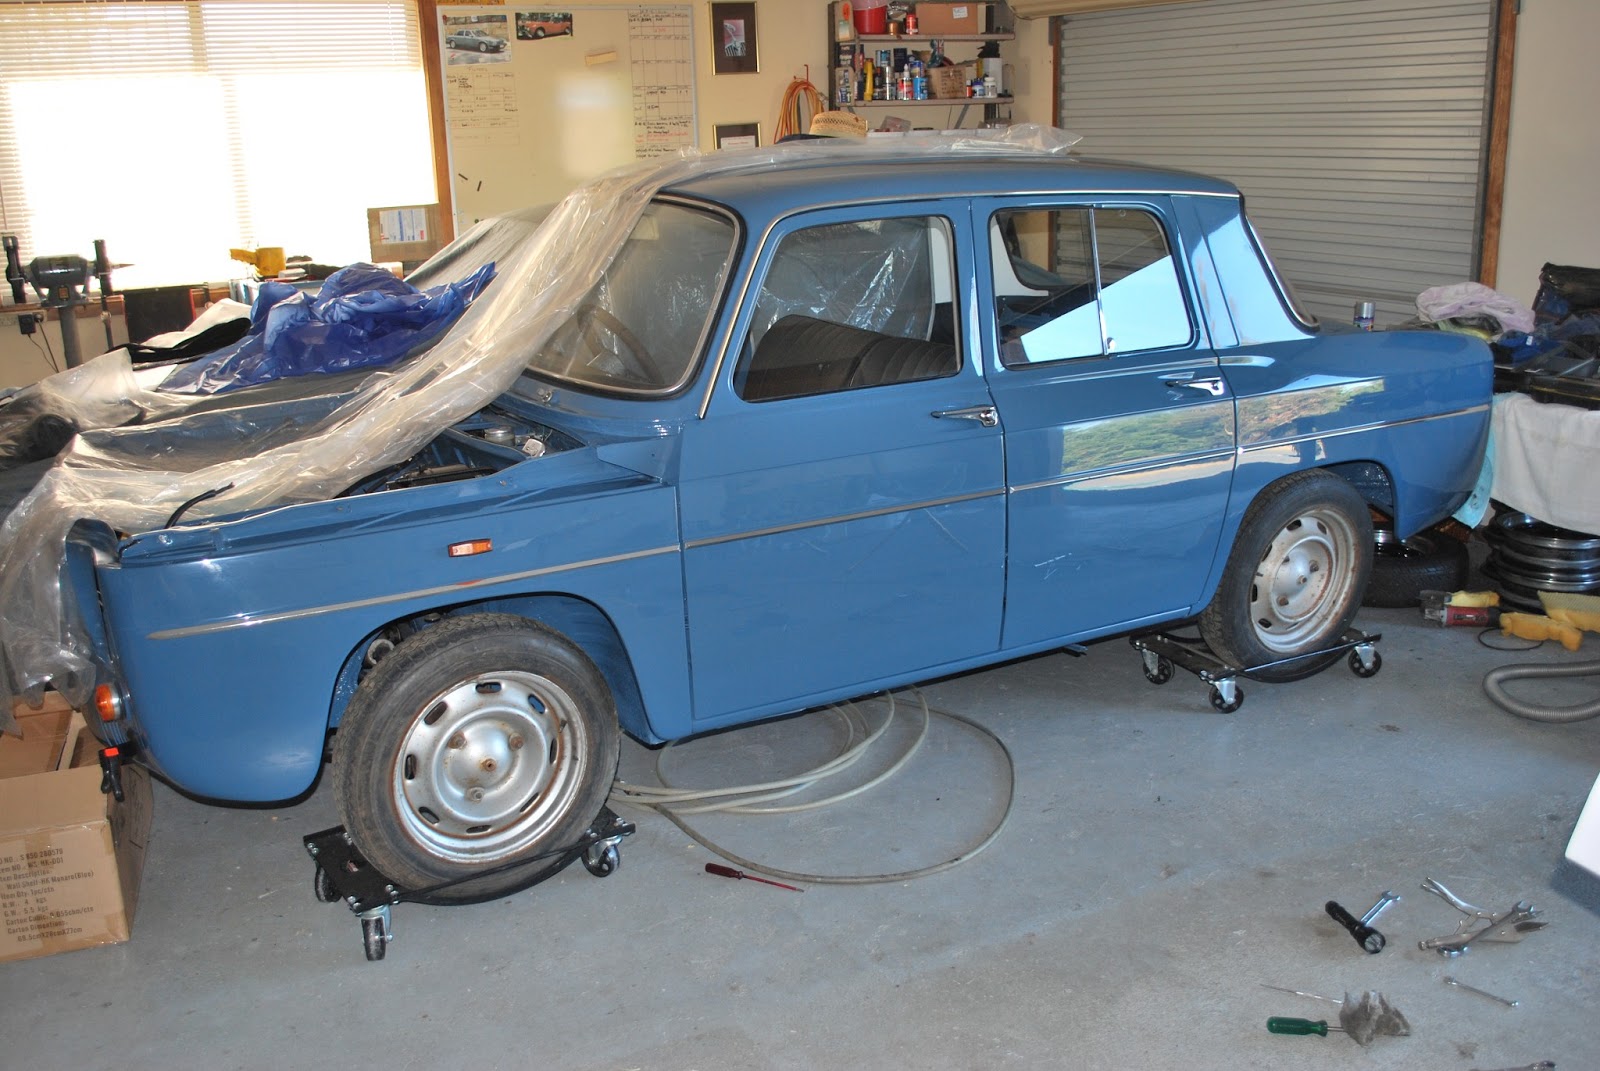
14 months to get to this stage.

Looks like a car again.
Wednesday, May 22, 2013
Interior moving along.
The car finally came back from the trimmer and he has put 4 pimples in the roof while doing the headlining. I have the Dent removal tech coming out to repair them and I'll give the bill for repairs to the trimmer. To say I am not impressed with the trimmer would be an understatement.
I have started replacing the seats etc today while the doors are off. I will complete the doors on the weekend and fit them up.


I have started replacing the seats etc today while the doors are off. I will complete the doors on the weekend and fit them up.
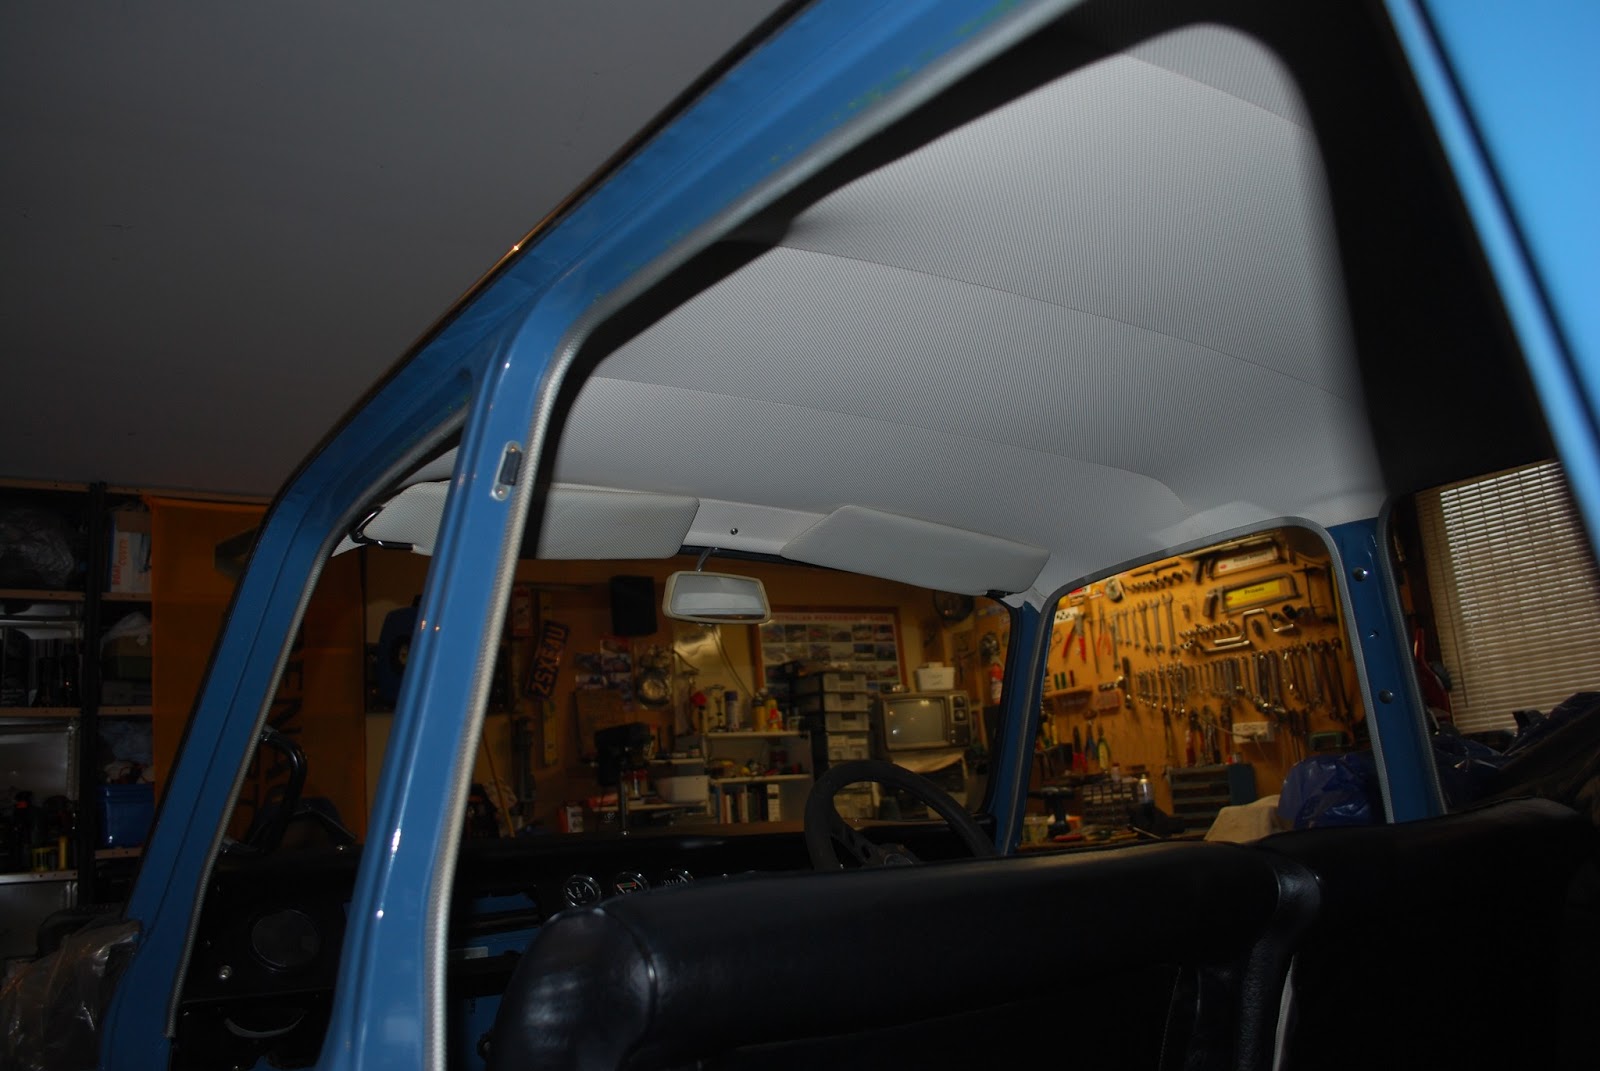
Hood lining in place.

Front seats and floor mats back in.

You can just see the pimples. They look like
mountains in the sun light!
Saturday, May 18, 2013
Fitting up the doors.
The shell was supposed to have come home yesterday from its 3 week job that was to take 1 week! My trimmer likes to leave things to the last minute so I had to cancel the truck as the front windscreen was not fitted on time.
I fitted up all the glass, rubbers and trim to one of the rear doors today. I had an old door nearby to copy from as its been a while since I stripped them. I only need to fit the aluminum strip to the outside tomorrow and the rubber weather seal. I will fit the seals when I have all the doors ready together.


I fitted up all the glass, rubbers and trim to one of the rear doors today. I had an old door nearby to copy from as its been a while since I stripped them. I only need to fit the aluminum strip to the outside tomorrow and the rubber weather seal. I will fit the seals when I have all the doors ready together.
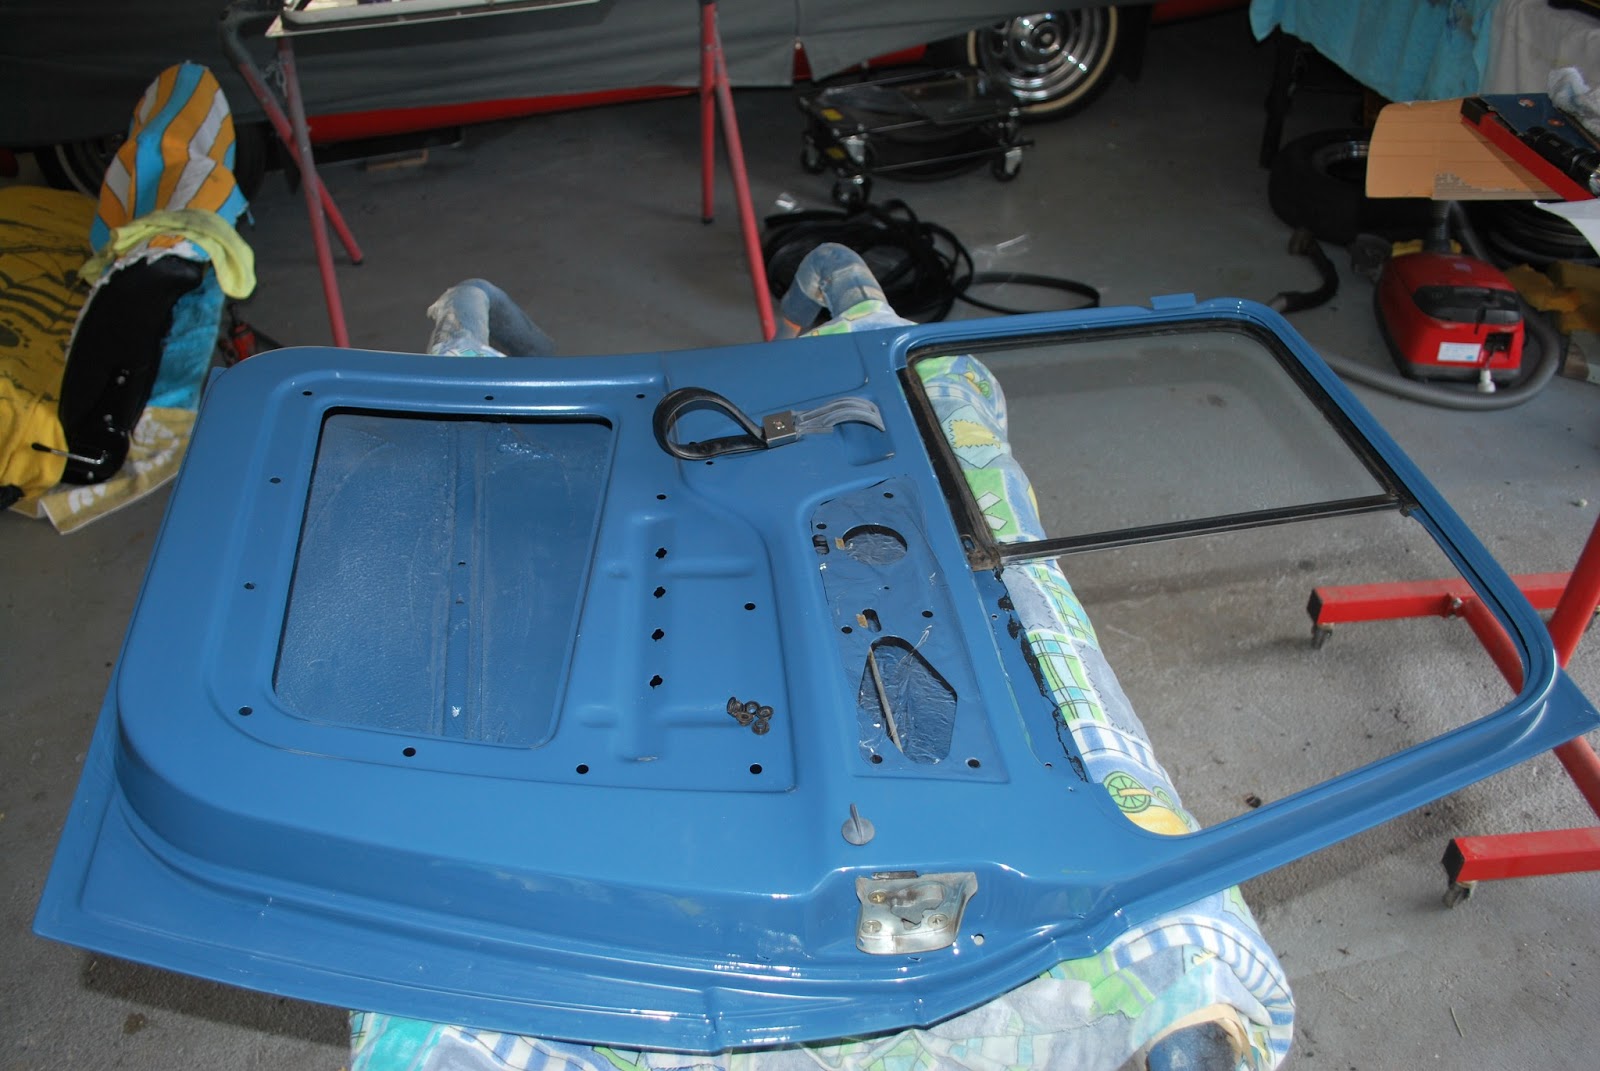
Lock fitted.

A fly screen spline roller was handy to fit the bailey channel.

Trim fitted.

Internal fit up completed. I will paint the faded door handles
and renew the chrome strip to make them look a bit better.
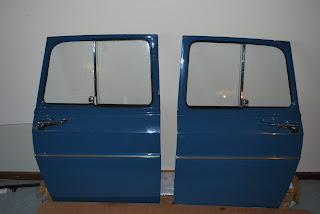 Outer of the completed rear doors.
 Inside of the completed rear doors.
 Front passenger door

Fitting up the front doors created a problem with new rubbers. I can wind up the window without much trouble but the new outer glass scraper wants to invert when winding down. The rubber sticks to the glass. I will try to roughen up the side of the rubber that mates with the glass in a hope it will allow the glass to slide properly.
I rubbed the aluminum outer body strips with 1500 wet and dry then polished them on the polishing wheel on the grinder. They came up quite nice.
The shell is now finished at the trimmer and will return home tomorrow.


Not too shabby.
Subscribe to:
Posts (Atom)