The car is booked in to have the hood lining done and the windscreens fitted at the end of March. I have ordered the hood lining material as a kit from J.Y Lardinois in Belgium as there is nothing like the original available here in Aus. The back seat will be re-trimmed at the same time. Front seats are OK and will stay original for the short term.
The door handles have been re-chromed and I'm just waiting for the bits to be zinc plated before they are sent back.
My spray painter has been busy painting a couple of buses so the panels have taken a back seat for the moment (not in the bus though). They should be back by the end of March, so not much will happen for another month at least.
Tuesday, March 5, 2013

Friday, February 15, 2013
The Cosmic's are back.
I finally got the Cosmic mags back from being repaired. The old repairs have been finished on the lathe to remove previous lumps of weld, the wheels were made true and a small buckle removed.
I have since re cleaned them and painted them in urethane and finished the center caps. I decided to paint the center vanes as well as it would have been difficult to mask up and polish.
The Cosmic MK1 wheel was never known for its good finish which is evident in the casting. There are casting marks where previous holes have been blocked off and you can see them in the photo's below. I tried to grind them back as best I could but they are still visible.
A set of MK2 wheels became available a couple of weeks ago but were sold quickly and I missed out on them. Maybe next time.

The sand blasted and cleaned wheels taped up and ready
for paint.

Primed.

First coat of urethane gloss black.

I painted the back as well.

Center caps ready to be fitted.

A finished wheel waiting for some rubber.
 Tire fitted. Kenda tire as a spare only.

Wednesday, February 6, 2013
Another long wait!
I sent my doors and panels to be repaired and painted some months ago. I was told they would be ready to be picked up by the end of January. However my panel beater has had 2 buses to re paint and so my panels have been put back in line behind everything else. So long as they don't get damaged while waiting. I have quite a few thing waiting to come back and they will probably all come at once leaving me with a bill that I will have to explain to the wife.
Waiting on-
- All Panels.
- Door handles to be chromed.
- Fittings to be zinc coated.
- Wheels to be re furbished.
More updates when these items come back. Stay tuned.
Friday, January 25, 2013
Chrome bits and pieces.
Not much has happened over the past couple of weeks as I always seem to be in wait mode. I hope my panels will be back next week and to be ready for that I have sent off the door handles to be re chromed and a heap of bolts, clips etc to be zinc plated including the clips that hold the side trims in place.
Other than that I have now put the rear brake lines in place. From the factory they have a rubber tube over the top of the copper lines, this becomes brittle with age and breaks away from the line. To renew the rubber protection I bought some rubber tubing, cut it to length and sliced it along its length and fitted it to the copper line. I then glued the slice together using super glue which gives a good finish which sets quickly. I bought a couple of 1.2m lengths of 12.5mm heat shrink from the local electrical supplies shop ($4.00 each) and pulled that over the new rubber on the lines and shrunk in into place. This gave the brake lines a nice smooth finish which should stay in place for many years.
If you use a lot of heat shrink and usually buy it from your local parts shop you are really paying a premium for it.$12.00 will get you about half a metre in various sizes.
Go to your electrical wholesaler and you can buy it in 1.2m lenghts for around $4.00 and that's for the larger diameter sections 12.5mm plus, the smaller sections 4mm-10mm are even cheaper.

Brittle and broken protective rubber on brake line.

New section of rubber hose placed over line and slice
glued together.

12.5mm heat shrink is a good size to fit over all fittings
and rubber hose.

Heat shrink left a bit longer than hose.

Section completed.
Friday, January 4, 2013
Tail lights and wheels.
I have cleaned and stripped all the paint from the Cosmic wheels and sent them off to Circle Track Wheels in Bathurst for some minor repairs. I have the gloss black urethane 2 pack paint here ready for their return. I intend to paint the back of the wheels as well for ease of cleaning.

I spent a lot of today working on the tail lights (not much else to do until the panels come back). I have 2 sets of used Australian lights and a new set of European ones. The European tail lights have ridges and hollows instead of the diminishing circles seen on the Aussie ones. I picked the best of the used Aussie lights which had a degree of over spray, dirt and 40 year old scratches on them. I rubbed them down with 2000 wet and dry to remove the paint and minor scratches then polished them on my polishing wheel on the grinder (being careful not to heat and melt the plastic). I removed the new rubber seals from the new European tail lights and put them on the polished Aussie ones, picked the best screws and cleaned them up as well. The screws are an odd size and I was unable to replace them. The photo does not do the lights justice, they look like new.


Cosmic wheels stripped and sand blasted ready
for repairs, painting and polishing.

Used Aussie tail lights polished and ready to be fitted.

European style tail light.
Tuesday, December 25, 2012
Dash Top.
25/12/12- I picked up my dash top and lower sections including the ash tray front on Christmas eve. It took 4 months to have it done.
It is sitting on the dash at the moment and I'm not sure how it will fit as yet.
I dropped into S.K's place the same day to have a look at his wiring. Looks like I have the front correct and I found what goes where in the engine bay.
26/12/12- The dash top is now fitted. It took a while to get it as correct as I could. When I took it to be re covered it was in poor condition and had shrunk around the corners. It still is a bit small in the corners however I placed some vinyl in there to cover the gap. The right hand side is not square so the fitment is not as good as I would like it but most people wouldn't notice it. Hind sight is a wonderful thing, I should have taken my R8 dash top for him to use as a template for the corners as it is in good condition.
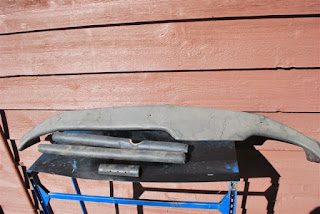

It is sitting on the dash at the moment and I'm not sure how it will fit as yet.
I dropped into S.K's place the same day to have a look at his wiring. Looks like I have the front correct and I found what goes where in the engine bay.
26/12/12- The dash top is now fitted. It took a while to get it as correct as I could. When I took it to be re covered it was in poor condition and had shrunk around the corners. It still is a bit small in the corners however I placed some vinyl in there to cover the gap. The right hand side is not square so the fitment is not as good as I would like it but most people wouldn't notice it. Hind sight is a wonderful thing, I should have taken my R8 dash top for him to use as a template for the corners as it is in good condition.
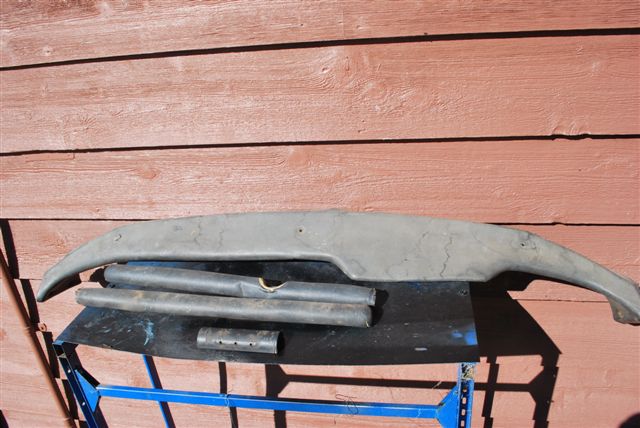
Before.

After
 Fitted.


Wednesday, December 19, 2012
Starting the trim.
I've started on the trim with the items I'm able to complete myself. I have made new backing boards for the front kick panels and re upholstered them in black vinyl. I had to straighten the rear parcel shelf by soaking it in water and pressing it straight before replacing the vinyl on it. It looks a bit grubby and stained but that will never been seen. The rear sections under the rear window have been re made with 3mm MDF as they are rotten and too far gone. Once these trim pieces are finished the shell will go to the trimmer for a new headliner and to have the back seat re covered. I pick up the recovered dash top on Christmas eve.


looks a bit stained and grubby but its been straightened
and ready to be recovered.

Vinyl cut and marked ready to be glued in place.

Dry fitment.

Glued in place with enough overhang to fold up
under the back section.

In place on the parcel shelf.

Original sound proofing in place prior to fitting the parcel
shelf.
 New rear sections marked out.
 Cut out.
 MDF cut and bent into shape.


Front and rear minor sections re covered in new vinyl.
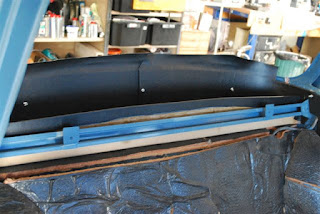 All rear trim pieces in place awaiting the hood lining
and windows.


and windows.

Subscribe to:
Posts (Atom)