Saturday, September 15, 2012

Buy new or rebuild minor gauges?

In my last post I mentioned that I have had my gauges rebuilt, with exception of the temperature gauge. The temperature gauge is with the wiring harness in Victoria (STILL!) so that was not done. The temperature gauge is corroded inside and the fellow who repaired the others said he might be able to put a new mechanical insert into the gauge, this would also require a new sender unit as well. Going on what I paid to have the others repaired and re calibrated I would think this would probably cost in the vicinity of $200.00! What to do?
Ebay France was the answer. I purchased a brand new original equipment Jaeger R8G/Alpine temperature gauge for AU$145.00 including postage.
Used gauges on ebay Fr start at 20 euros plus postage and new ones between 75-99 euros plus post, so this is a good alternative if the old ones have had their day. Speedo's and Tacho's are a different story though. My Speedo cost around $350 to repair and re calibrate and the Tacho about $150. Used Speedo's and Tachos on ebay France start at 500 euros second hand.
My new gauge.

Wednesday, September 5, 2012

Finally something comes back!

I picked up the instruments today after having them cleaned and re-calibrated. Unfortunately the temperature gauge is not ready yet as it requires a new unit fitted to the gauge body. It should look original but with a different sender unit. If your thinking of having yours done be aware of the cost. There was little change from $700.00 for the four that have been done so far and $350.00 of that was care of the Speedo. I need a scotch after paying that account!


Monday, August 27, 2012

Some old photo's

I received some old photo's today from the cars original owner Mr. J Sever. I have put them here for all to see and I hope you enjoy them as much as I do. Great to see it in its original state and good to use the photos as a restoring reference.


 Mesh protectors on the outer lights.


 Polished rocker cover.


Thursday, August 23, 2012

It can't be done!

Both front door trims were badly water effected and for reasons I'm not quite sure of I took them to a motor trimmer to have new cards made and the vinyl put back on. Well. It can't be done I was told! The vinyl won't come off the old cards because when the design is put on the vinyl it glues to the card, the chrome strip at the bottom will fall off, the sky will fall in and we'll all be killed. I don't like the can't word so I bought some Masonite and armed with some contact adhesive, jig saw, the hole punch set and the staple gun I made new cards and used the original 44 year old vinyl and the sky is still up there. Having said that some very nasty clouds are here now and it is raining heavily so maybe he was right! You decide.

 You can see how badly bent the old card is in this photo.
The old card with vinyl removed.
New card marked out. 
 Old vinyl glued and stapled in place.
The finished trim.

Wednesday, August 15, 2012

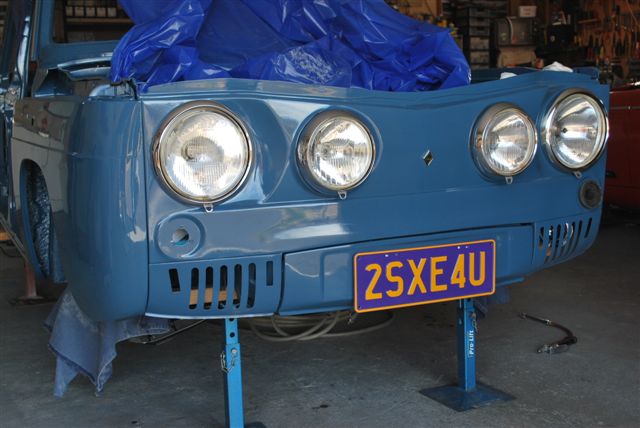
Too Sexy for you.

Here are some photos of some more finished panels. At present I'm completing some fiddly bits as I'm still waiting for stuff to come home.


Tuesday, August 7, 2012

Keeping on the move.

With all the panels now stripped and waiting repairs and painting and still waiting for other components to be returned and fitted I'm continuing to move along completing parts and storing them ready for fitting when the time comes. I have stripped all the rear tinware and given it all 4 coats of RFU gloss black. The radiator will be reconditioned next week and fitted up to the radiator panel as well.


Monday, August 6, 2012

All the panels are now stripped.

Today I finished stripping all the parts and paint from the doors which finish all the panels except the bonnet. I have another bonnet which is already stripped, I only need to pick it up.
Its taken a couple of weeks to get the panels ready and I can say with conviction I'm glad that its over! I have worn out 5 wire wheels, 40- 4 inch sanding pads and used 8 litres of paint stripper. I also wore the same trousers and jumper for the paint stripping part (I kept them outside) and they will go straight into the bin.
I have 7 panels to go to the panel beater for minor repairs and some welding. Including the 4 doors (for some minor welding), front and rear left guards and the rear panel.
The photos below show one of the rear doors being stripped from start to finished in bare metal. It will be rust converted today and the inside treated with POR15 tonight and etch coated tomorrow.

 Ready for the first layer of paint stripper.
 Some sections are crazing but most of the paint just softens. 
 First layer of stripper and paint removed, ready for another layer of stripper.
 All paint removed, now to turn it over for the difficult side.
Note the small rust holes to be welded up.
Rear doors in etch primer waiting some minor repairs.
After a couple of weeks of paint stripping, these clothes are destined for the bin!