Tuesday, December 25, 2012

Dash Top.

25/12/12- I picked up my dash top and lower sections including the ash tray front on Christmas eve. It took 4 months to have it done.
It is sitting on the dash at the moment and I'm not sure how it will fit as yet.
I dropped into S.K's place the same day to have a look at his wiring. Looks like I have the front correct and I found what goes where in the engine bay.

26/12/12- The dash top is now fitted. It took a while to get it as correct as I could. When I took it to be re covered it was in poor condition and had shrunk around the corners. It still is a bit small in the corners however I placed some vinyl in there to cover the gap. The right hand side is not square so the fitment is not as good as I would like it but most people wouldn't notice it. Hind sight is a wonderful thing, I should have taken my R8 dash top for him to use as a template for the corners as it is in good condition.

 Before.
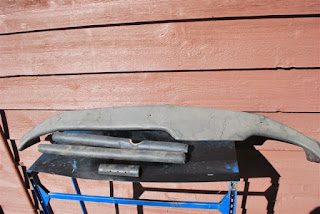
After
 Fitted.

Wednesday, December 19, 2012

Starting the trim.

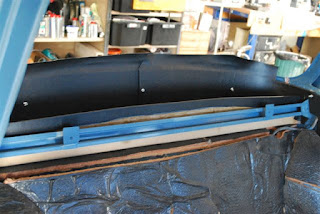
I've started on the trim with the items I'm able to complete myself. I have made new backing boards for the front kick panels and re upholstered them in black vinyl. I had to straighten the rear parcel shelf by soaking it in water and pressing it straight before replacing the vinyl on it. It looks a bit grubby and stained but that will never been seen. The rear sections under the rear window have been re made with 3mm MDF as they are rotten and too far gone. Once these trim pieces are finished the shell will go to the trimmer for a new headliner and to have the back seat re covered. I pick up the recovered dash top on Christmas eve.

 looks a bit stained and grubby but its been straightened 
and ready to be recovered.
 Vinyl cut and marked ready to be glued in place.
 Dry fitment.
Glued in place with enough overhang to fold up 
under the back section. 
 In place on the parcel shelf.
 Original sound proofing in place prior to fitting the parcel
shelf.
New rear sections marked out.
 Cut out.
MDF cut and bent into shape.
Front and rear minor sections re covered in new vinyl.
All rear trim pieces in place awaiting the hood lining
and windows.

Monday, December 17, 2012

Panels ready for painting.

All the panels except for the bonnet have now been repaired. A lot of work has been put into repairing the rust in the doors and minor damage to the guards as well. The marks you see in the third photo are from the equipment used to heat and shrink the metal back into or as close to the original. The name of the tool escapes me at the moment however it is an electric tool which replaces the old oxy torch and wet rag. As you can see the rear of the panel was painted with POR15 and there is no damage to the paint except for the swirl marks. All the eight panels should all be painted by mid to late January, then starts the long job of putting the doors back together. Somewhere during this time I will take the shell in to to the trimmer and have the hood lining and all the other trimming completed. Sorry about the quality of the photos as they were taken on my phone.

 Right rear guard.
 Front left guard.
 These marks are from heating and cooling the metal 
to bring it back into shape.
 I had repaired and painted this guard however I was unhappy 
with the finished job so I had it re done.
The rear panel was one of the worst panels to repair.
There were lots of holes to weld up and general damage.
This is not the original panel as the original was badly 
rusted on the bottom.

Saturday, December 1, 2012

Wiring Loom.

The wiring loom arrived back from Victoria yesterday. All the wires to the engine bay have been replaced, lots of new plugs fitted and re wrapped in the original grey vinyl. I have fitted the loom up to the dash and instruments and run the small loom for the interior light etc. The next job which will be the most difficult will be replacing the loom back into the car. I remember all too well putting a new loom into my last Gordini and it was by no means easy. I will start at the left A pillar and pull the harness to the rear which I think will be the easy section then starting on the right A pillar feed the front harness into position. This will all have to wait a week or so as I am recovering from a bout of infected sinus at the moment and as from Monday night I'm back working nights for the week. Oh the joy.
 Re-fitting the harness to the dash and instruments.
Lucky I kept some good notes.
 The dash back together.
The section of loom to go to the rear of the car.
Pulling the harness into the front of the car.
 The dash is finally bolted into place for good.
A little tidying up of the harness is required.
The steering wheel will have a leather cover made for it.
Running the harness across the front.